
Laser Cut Kits
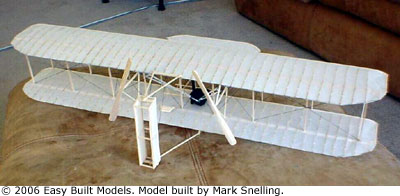
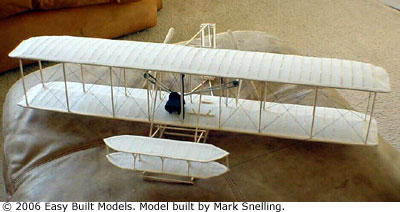
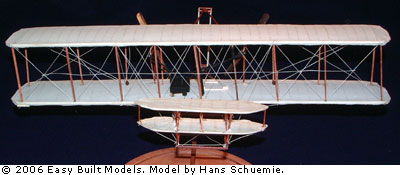
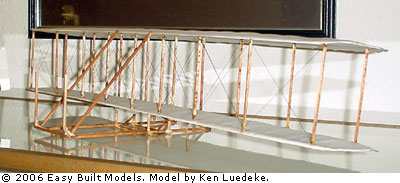
Wright Flyer 1 (LASER CUT)
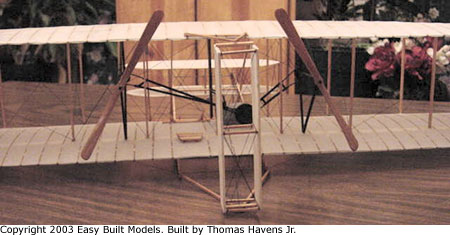
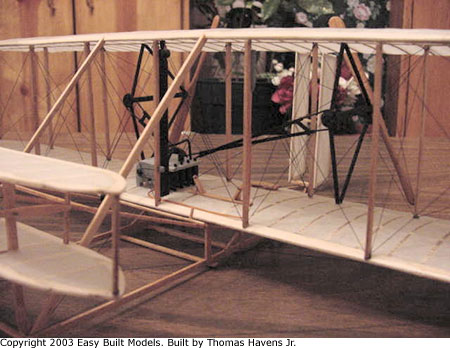
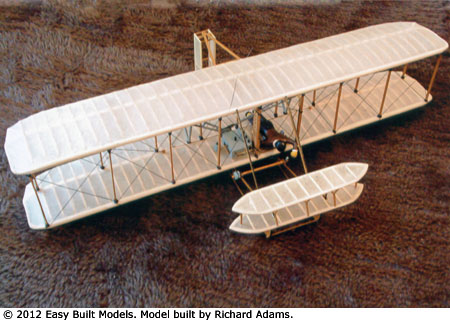
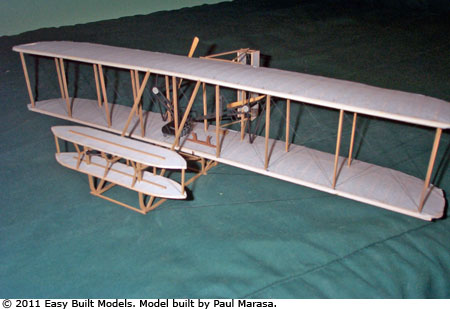
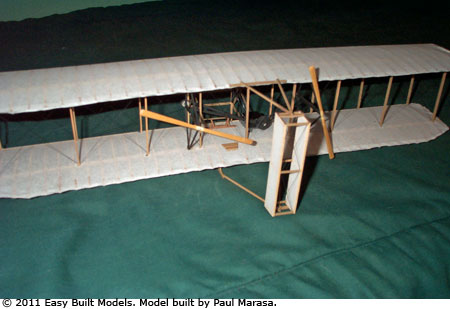
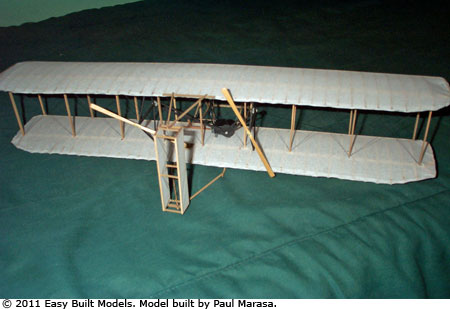
This 1:20 scale model kit of the first engine-powered flying machine to make a successful flight commemorates the dawn of powered flight. On December 17, 1903 Orville Wright launched the Wright Flyer I from a sand dune known as Big Kill Devil Hill near Kitty Hawk, North Carolina. The flight lasted 12 seconds and a distance of 120 feet. The Wright Flyer I was the culmination of years of research and testing during which brothers Orville and Wilbur Wright designed and built all the components of the Flyer including the propellers and engine.
This LASER CUT kit is popular for school projects in both history and science since it is an accurate scale model of the original airplane which is on display in the Smithsonian Institution Museum of Air and Space.
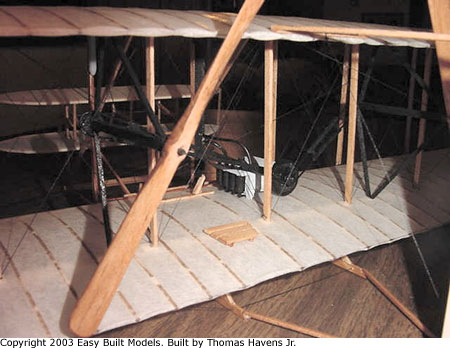
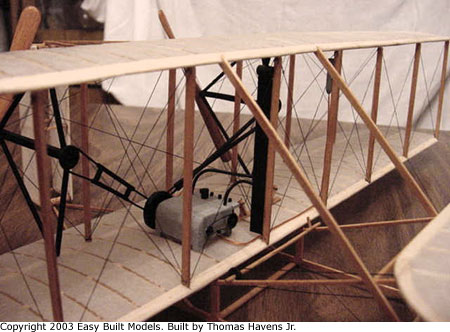
This kit includes laser cut balsa parts, balsa strip wood, wire, thread, and Easy Built Lite tissue covering. Also includes a laser cut pilot profile in the prone position, and laser cut engine assembly. To build this kit you will need a building board, hobby knife, glue, thread, and fine sandpaper. This kit is completely laser cut, saving hours of time cutting out parts. The builder determines the level of detail for this model and may need to supply additional materials.
Wright Flyer 1 (LASER CUT)
24" wingspanClass: Scale display model, 1:20 scale
Building Skill: Experienced
kit #D10LC, price: $46.75
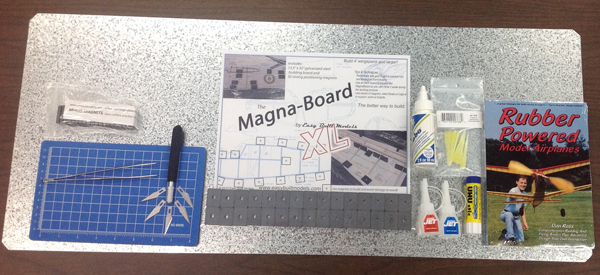
Building Set for Rubber Power
Includes a hobby knife, 5 blades, straight point tweezers, 5.5" x 9" Self Healing Cutting Mat, Jet Instant glue, Jet Super glue, Jet Tips, glue stick, canopy glue/tacky glue, MagnaBoard XL™ set, Minus Magnets 20 pack, and Rubber Powered Model Airplanes book. Save 25% off individually priced items! There is a limit of 2 sets per order.
item B329 Price: $79.95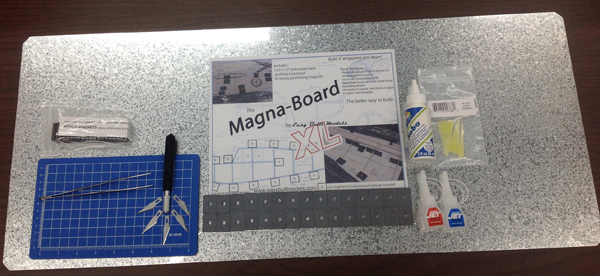
Building Set
Excludes the book on rubber power and the glue stick. Includes a hobby knife, 5 blades, straight point tweezers, 5.5" x 9" Self Healing Cutting Mat, Jet Instant glue, Jet Super glue, Jet Tips, canopy glue/tacky glue, MagnaBoard XL™ set, and Minus Magnets 20 pack. Save 25% off individually priced items! There is a limit of 2 sets per order.
item B332 Price: $66.95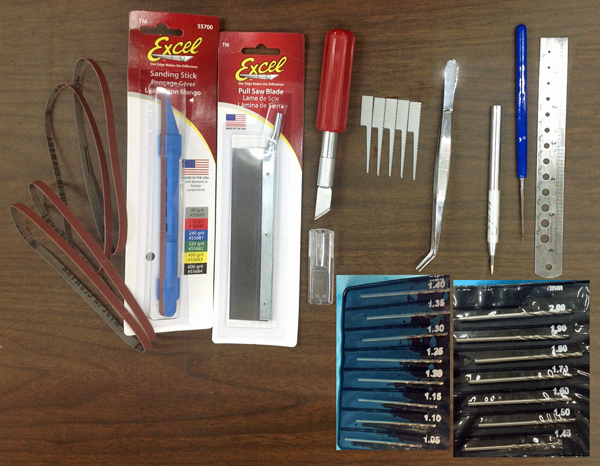
Advanced Tool Set
Includes Sanding Stick with 120, 240, 320, 400, and 600 grit belts, Pull Saw Blade, K5 Heavy Duty Knife with beveled blade, Narrow Keyhole Saw Blades 5 pack, Curved Tip Tweezers, 1/16" Ball Tip Burnisher, Jewelers Needle Point Awl, Steel Ruler 6" x 1" with drill gauge, 15 piece drill set (1.05mm - 2mm). Save 30% off individually priced items!
item B330 Price: $45.99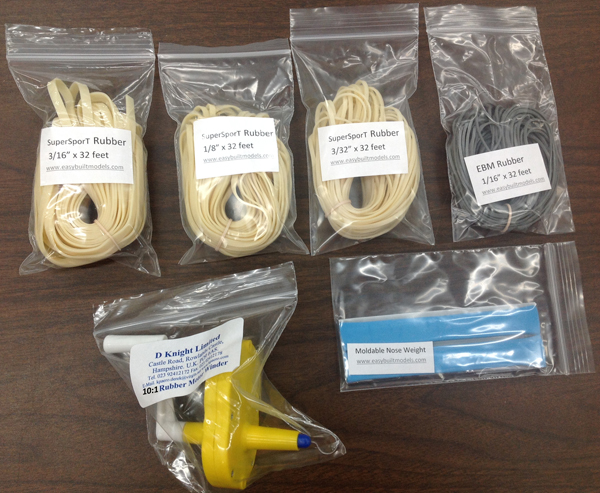
Flight Pack for Rubber Power
Includes a 10:1 winder, moldable nose weight, FAI SuperSport rubber 32 feet each 3/32", 1/8", and 3/16" and 32 feet EBM 1/16" rubber. Save 23% off individually priced items!
item B331 Price: $34.95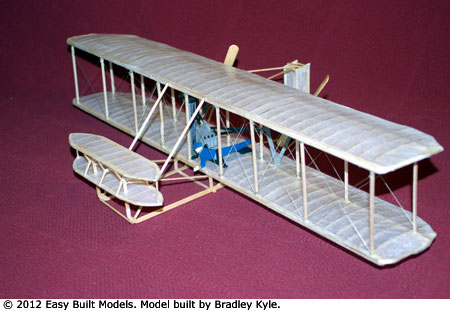
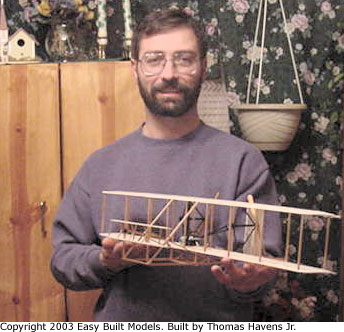
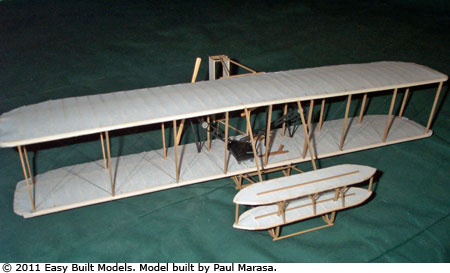
This newly completed model built by Brad Kyle shows off the laser cut pilot profile included with the kit.


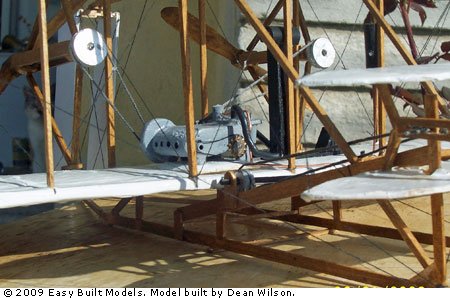
"Finished my flyer and added the launch rail and catapult. It looks as close as I could get it. Thanks for all this fun." - Dean Wilson


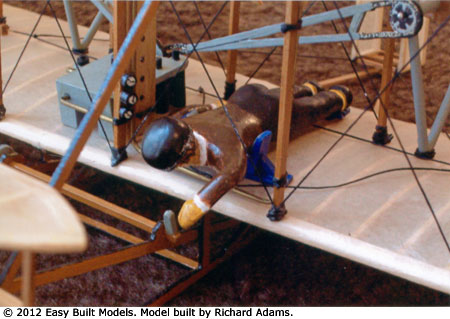
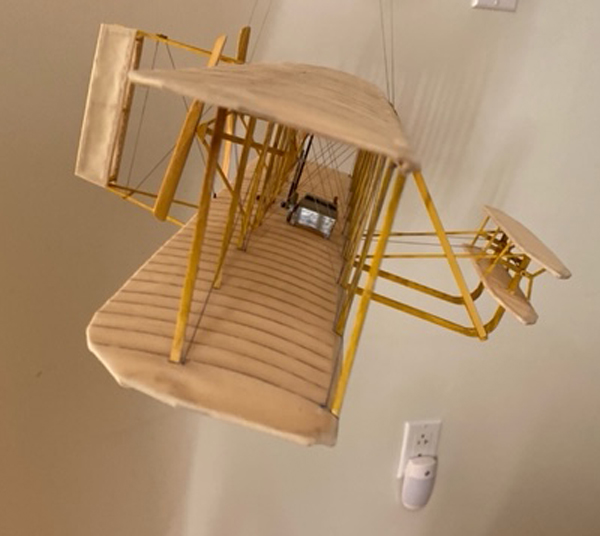
Richard Adams added many details to his Wright Flyer, including carving his own 3 dimensional pilot.
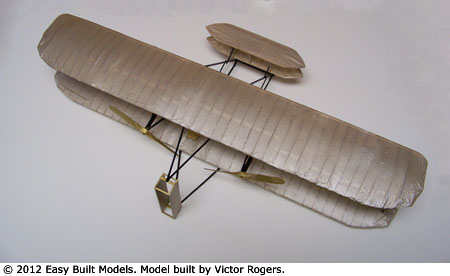

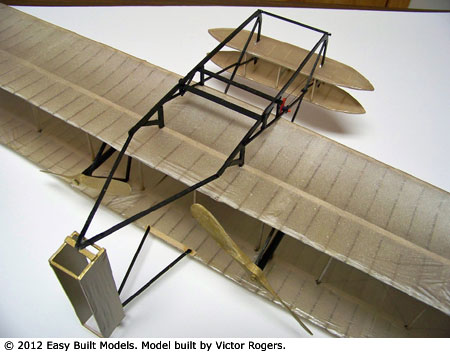
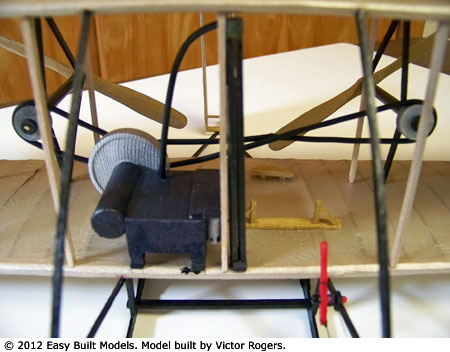
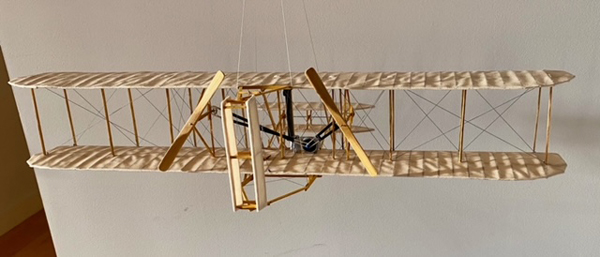
" ...I have a lathe, so I was able to make pulleys and inserts for the prop shafts so they rotate inside a part of a drinking straw. I also drilled tiny holes for the rigging, and used a needle threader to pull the thread through, I used silver thread so it resembles wire. I used insulated electrical wire for the belts. I made a lever to operate the stabilizers, and that is functional. In case you wonder, I am 85 years young, retired engineer from Westinghouse and computer programmer from IBM." - Victor Rogers

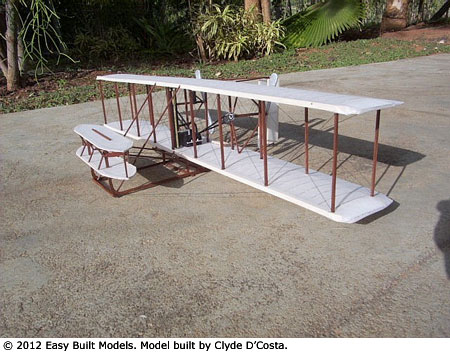
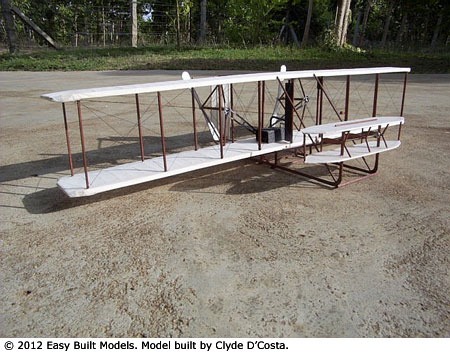

Construction photos, building notes, and history from Clyde D'Costa.

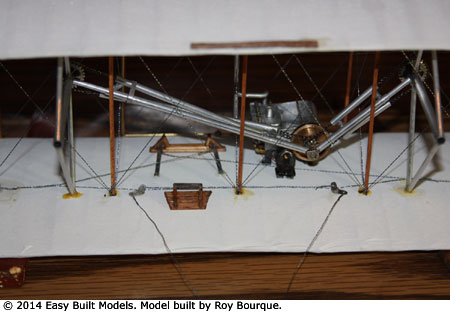
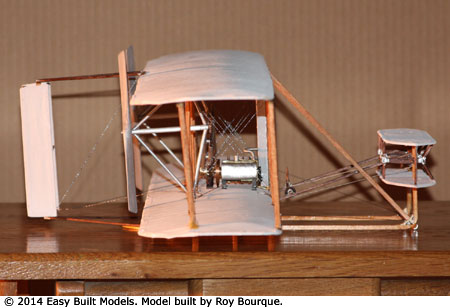
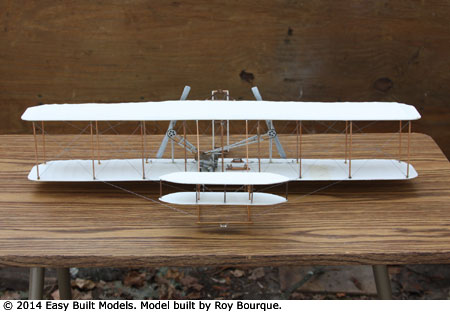
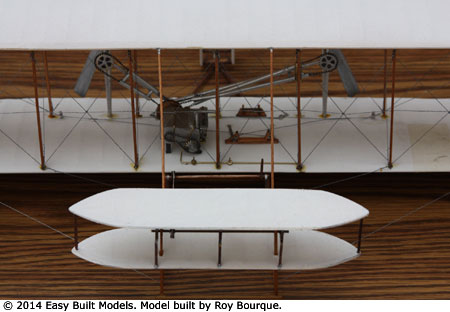
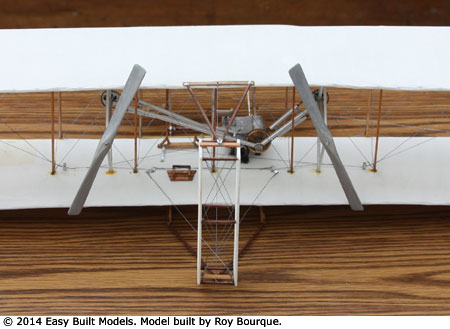
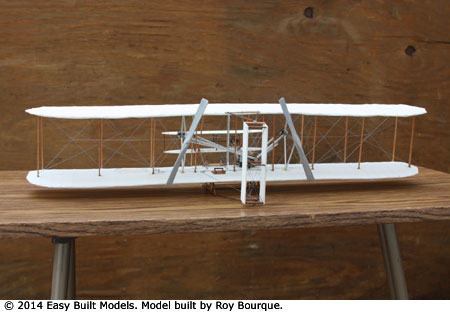
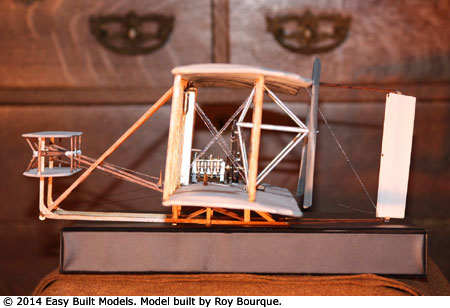
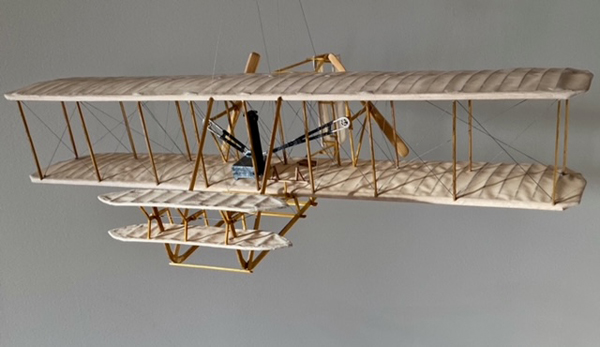
"Attached are photos of the Wright Flyer D-10LC model kit that I built. I built the wooden wings and assembly from the kit but chose to build the metal parts out of metal stock. A wood stain was used to darken the balsa wood. I used a print of the wright flyer for details. I used a small chain necklace for the chain. I used the same necklace to attach links for the rigging. I used silver embossing thread for the wire rigging. I had a discarded instrument that I recovered gears from and filed them thinner so the chain would fit over them for the sprockets. I used a black magic marker to make the gears look like sprockets. I used wood glue for the balsa wood, thinned Elmer's glue for the fabric covering, and Sinbad super glue for the metal parts. The engine block was made from a shaped pine wood block that was covered with aluminum flashing using super glue to hold it on. Jewelers files were used to shape the intricate metal parts, and a dremel tool with 32nd drill was used for small holes. Surgeons pliers were used to hold small parts while shaping or assembling. I used silver paint to denote metal hinge joints and fine point black magic marker for the pivot points such as in the stabilizer connecting rods and rudder pivots." - Roy Bourque
If you'd like to know more about the Wright Flyer and the invention of the airplane, visit these museums online or better yet, in person!
Smithsonian Air and Space MuseumCarillon Historical Park & Dayton History Museum