
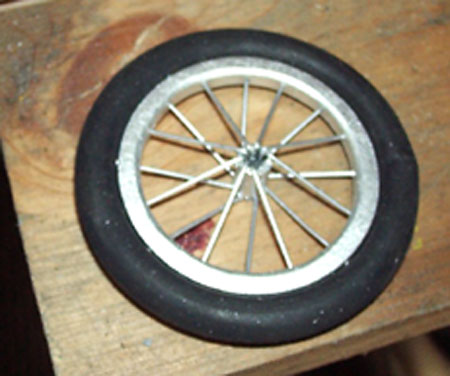
This article describes how I made a set of 16-spoke scale wheels with tires ¼" x 2½". I used materials and processes I had on hand. Using the right materials and dimensions, they can be scaled to other sizes. Spoke assembly is a little tedious, if not frustrating, and might require a practice session or two, but the results are worth the effort. They are for display only, not flying.
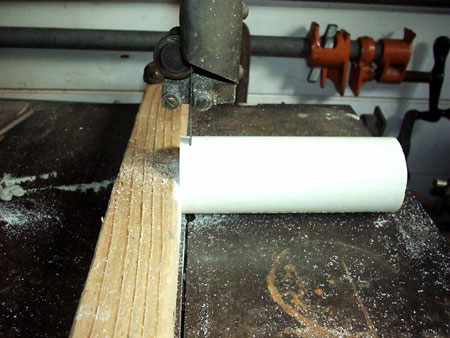
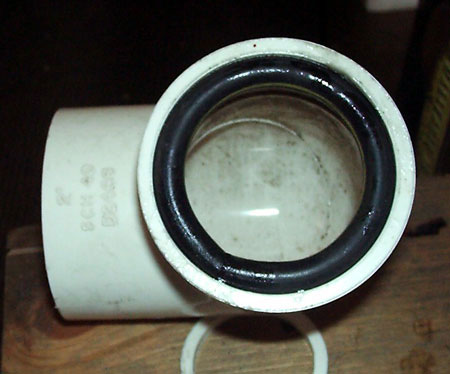
Cut a slice of 1½", inside dimension, PVC tube slightly
larger than 0.2" thick for the rim. Sand to a uniform 0.2" thickness.
With a compass, draw a circle on a board equal to the inside diameter
of the rim. Using a protractor, construct radial lines every 22½ degrees.
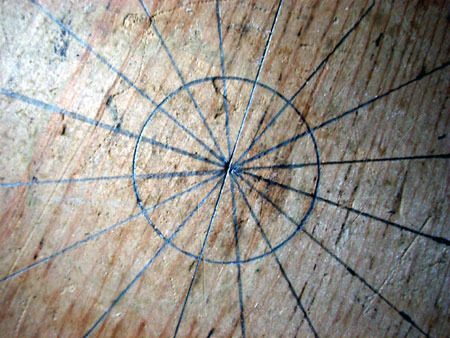
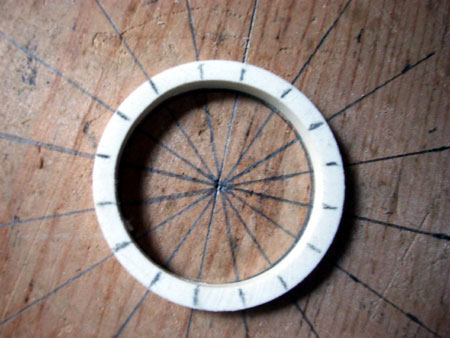
Place the rim over the circle and mark the perimeter in line with
the 22½ degree marks.
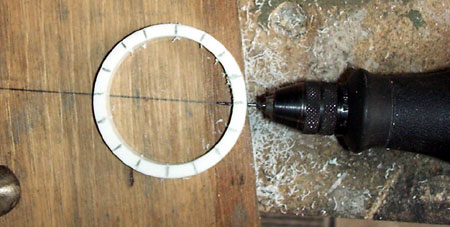
Mount a Dremel tool with a 0.04" (#60) drill bit horizontally,
with the tip of the bit off the surface in line with the center
of the thickness of the rim.
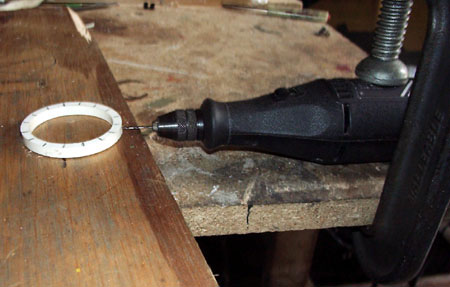
Carefully slide the rim into the bit at each marked location to
drill 16 spoke holes. Keep the rim square with the bit when drilling.
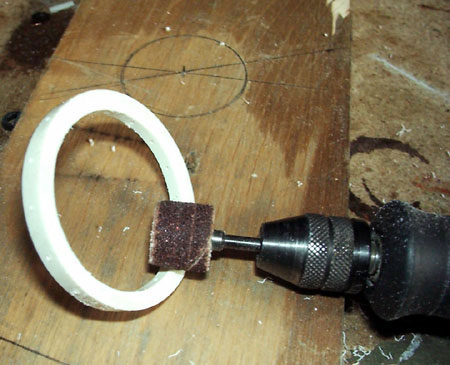
Bevel the inside diameter and round the edge of the outside diameter
of the rim.
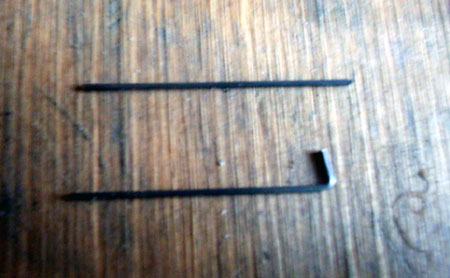
Cut 16 spokes approximately 1½" long from 0.032" music
wire. Bend about 3/16" of one end of each a little over 90
degrees.
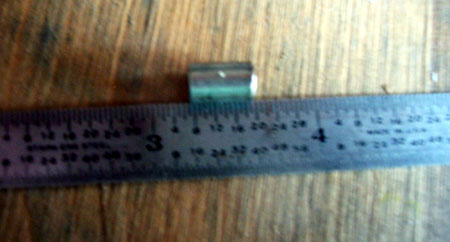
Cut a section of 0.185" I.D. x 0.25" O.D. steel tubing a little over
3/8" long for the hub. Grind ends parallel to 3/8" final length.
(This will wind up accommodating an axle 0.110" in diameter
or smaller. To use a larger axle, use a larger inside diameter tube.)
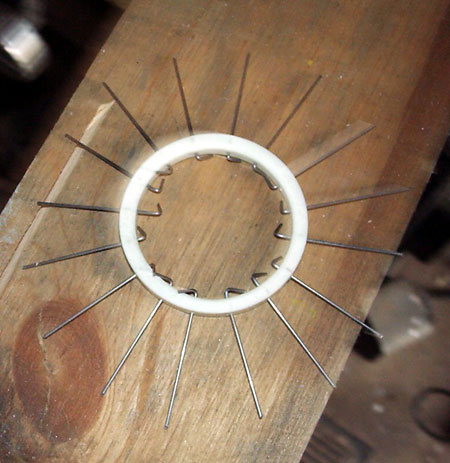
Insert all 16 spokes into the rim from the inside.
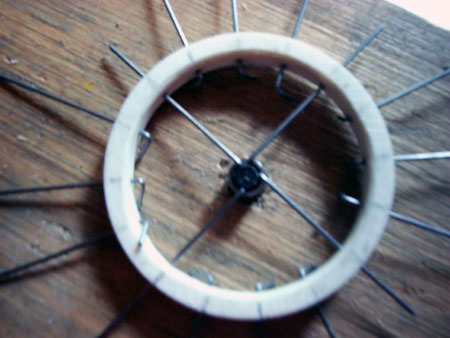
Drill a 9/32" diameter hole in a board about 1/8" deep. Set the hub in the hole and set the rim over it. Using needle-nose pliers, hook 4 spokes spaced 90 degrees apart over the hub. (Note that the 8 spokes on one side are all one mark (22½ degrees) from those installed on the opposite side.
Pack the center of the hub with a small piece of soft rubber or
a wood peg to hold the 4 spokes in place (I used a section of rubber
o-ring). Pick up the assembly, turn it over and place it on another
slice of the tube to hold the hub off the table. Starting with a
spoke 22-1/2 degrees from one of those already installed on the
other side, align it with the bend down and grasp the end at the
bend with small needle nose pliers. Lift the end to clear the hub
at the same time pushing the hub down against the bottom spokes
and hook the spoke over the hub. IT IS VERY IMPORTANT TO PUSH
THE HUB DOWN AS FAR AS POSSIBLE SO THAT THE NEW SPOKE IS NOT OVERLY
STRESSED AND BENT TO CLEAR THE HUB. At this point the hub is very
unstable so one hand must be used to keep it pressed down while
the spoke opposite the one just done is installed. After this, the
assembly is reasonably stable.
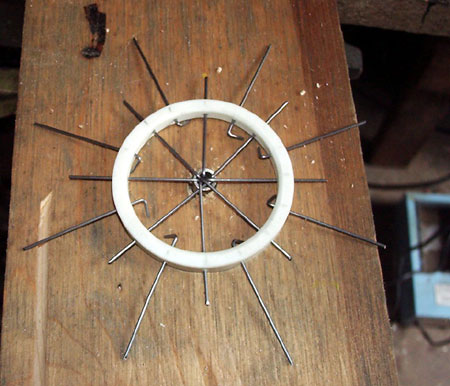
Install the other two at 90 degrees to the first pair on this side, then
two more across from each other at the 45 degree points on this side.
Turn over, remove the hub filler material and install the remaining
4 on the first side, then over again to install the remaining 2
on the other side.
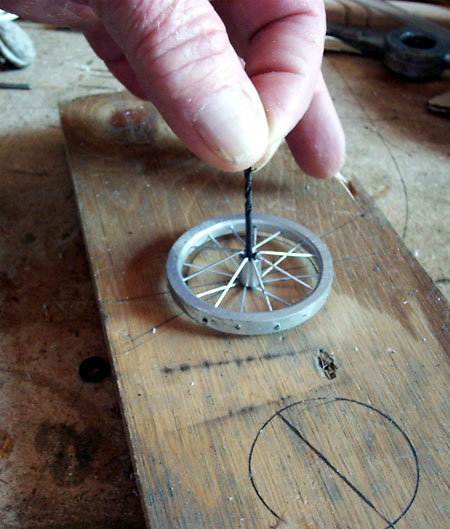
Slide a 0.110" (#35) drill bit through the hub (a second
one started from the opposite side may be necessary to align the
spoke ends to allow the first to go all the way through.)
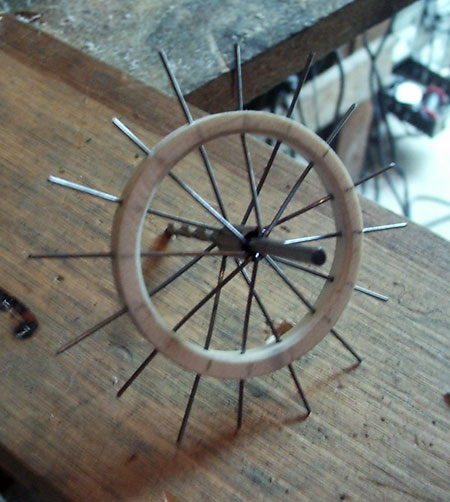
Make sure all spokes are pulled out so that the bent ends are in
contact with the hub and properly positioned. Trim the spokes with
cutters. Put a shallow 0.110" hole in the center of the circle
used to layout the spokes. Rest the end of the inserted drill in
the hole and turn the wheel, checking for run-out against the circle
on the board. Holding the hub with the drill, push the rim in the
proper direction to get the hub reasonably centered.
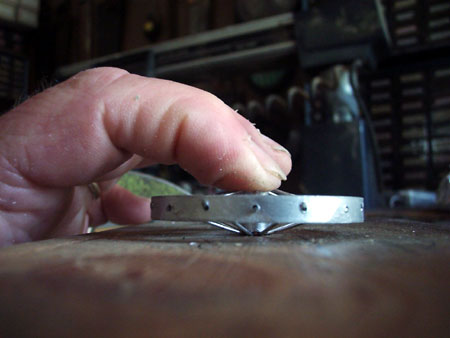
Place the wheel horizontally on a flat surface and press the hub
down. Visually verify that the rim is the same height off the surface
all the way around. If not, gently push the high spot down. Recheck
the wheel for roundness.
Flush the hub and spoke ends with alcohol to remove grease. Again, make sure the spoke ends are properly aligned in the hub and fill the hub with epoxy. (There is less danger of it running out if you partially fill it from one end then do the other end after the first has set.)
When the epoxy is fully set (several hours for 5-Minute Epoxy)
carefully drill a hole for the axle (smaller than 0.110".)
and insert a piece of axle. Carefully grind off the remainder of
the spokes sticking out of the rim, being careful to not disturb
the outer surface of the rim. (The spokes don’t have to be
absolutely flush.)
Paint the spokes, hub and rim as desired. Remove the axle.
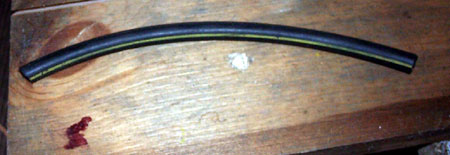
Cut a piece of ¼" automotive rubber vacuum hose 7"
long for the tire. Smooth and taper the ends slightly toward the
center (outer edge when installed slightly longer than inner edge.)
Wrap it around the rim to check the fit and trim as necessary. Light
sanding with a belt or disc sander works well for this. The fit
should be tight.
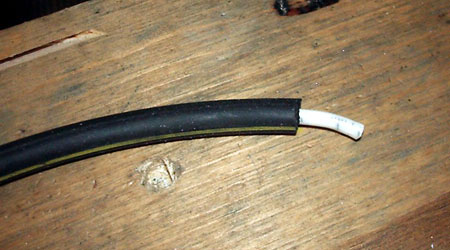
Cut a 1½" length of round plastic that fits snugly into
the hose. (Jacketed 4-conductor 22 gage phone cable is the right
size.)
Clamp a 2" PVC union in a vise.
Wipe the inside with a rag and a tiny amount of light oil to serve
as a release. Mix fast setting epoxy, coat the insides of the hose
ends for at least ½", coat the insert, put it in the
hose and join the ends, making sure the insert bridges the gap.
Press the tire into the bore of the PVC, align the joint and wipe
off the excess epoxy.
Allow the epoxy to set to full strength. Remove the tire and sand or file the joint smooth. If there are gaps, they can be filled with black aquarium sealer or any other black rubber filler or adhesive.
Install the tire on the rim. If the fit is tight, heat the tire
in hot water first. If there is a gap between the tire and the rim
at the joint, put a drop of epoxy under the tire at this point and
clamp the tire and rim across the diameter until the gap closes.
Let cure.
There are many variations of this process possible but this should start you in the right direction.
Happy building,
Malcolm Campbell
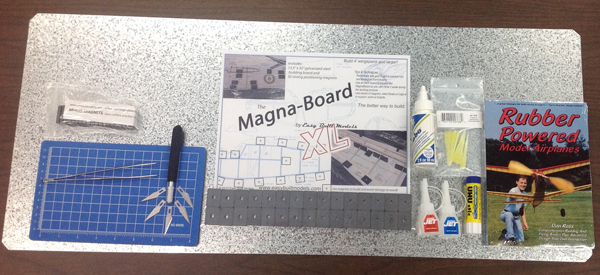
Building Set for Rubber Power
Includes a hobby knife, 5 blades, straight point tweezers, 5.5" x 9" Self Healing Cutting Mat, Jet Instant glue, Jet Super glue, Jet Tips, glue stick, canopy glue/tacky glue, MagnaBoard XL™ set, Minus Magnets 20 pack, and Rubber Powered Model Airplanes book. Save 25% off individually priced items! There is a limit of 2 sets per order.
item B329 Price: $79.95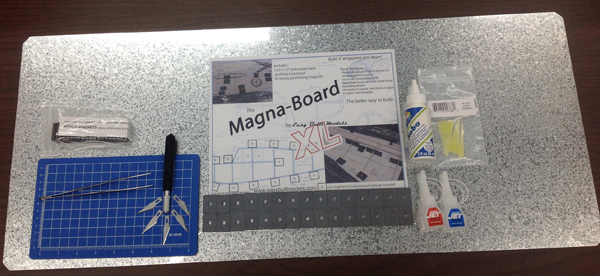
Building Set
Excludes the book on rubber power and the glue stick. Includes a hobby knife, 5 blades, straight point tweezers, 5.5" x 9" Self Healing Cutting Mat, Jet Instant glue, Jet Super glue, Jet Tips, canopy glue/tacky glue, MagnaBoard XL™ set, and Minus Magnets 20 pack. Save 25% off individually priced items! There is a limit of 2 sets per order.
item B332 Price: $66.95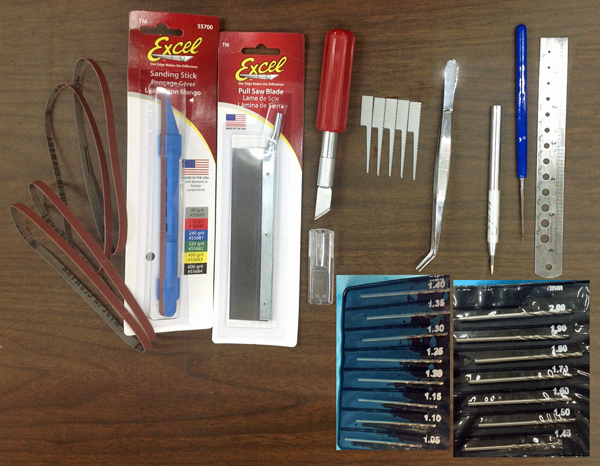
Advanced Tool Set
Includes Sanding Stick with 120, 240, 320, 400, and 600 grit belts, Pull Saw Blade, K5 Heavy Duty Knife with beveled blade, Narrow Keyhole Saw Blades 5 pack, Curved Tip Tweezers, 1/16" Ball Tip Burnisher, Jewelers Needle Point Awl, Steel Ruler 6" x 1" with drill gauge, 15 piece drill set (1.05mm - 2mm). Save 30% off individually priced items!
item B330 Price: $45.99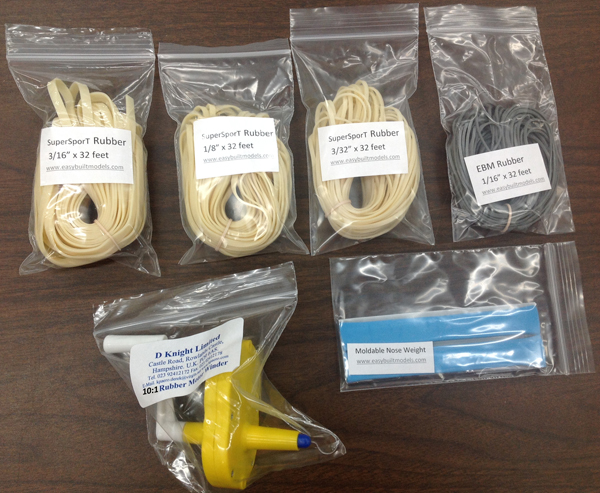
Flight Pack for Rubber Power
Includes a 10:1 winder, moldable nose weight, FAI SuperSport rubber 32 feet each 3/32", 1/8", and 3/16" and 32 feet EBM 1/16" rubber. Save 23% off individually priced items!
item B331 Price: $34.95