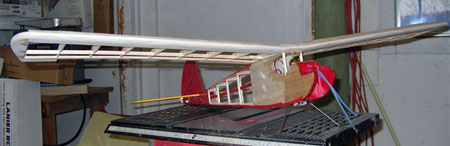
Commando Kit
Commando Construction Notes, page 3
page 2
forward to page 4
page 3: Commando Construction Notes
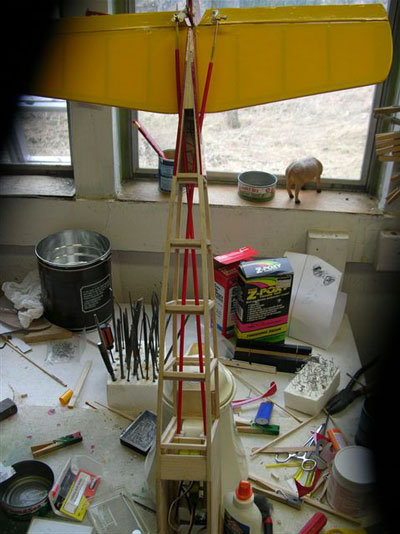
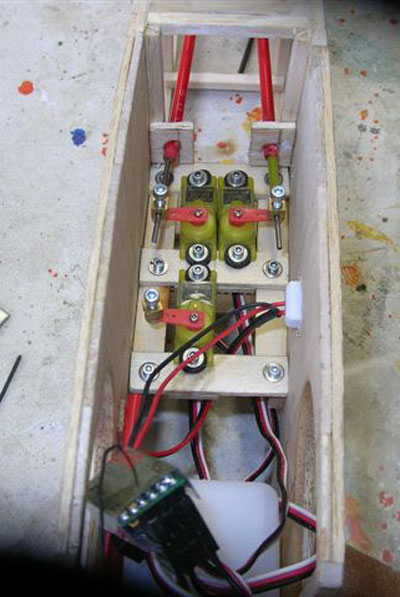
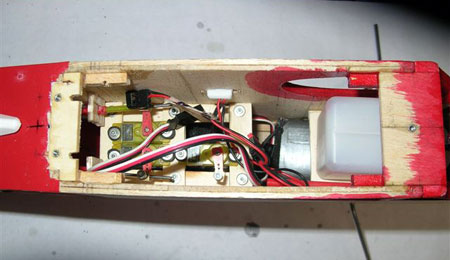
by Don SeboltTubing run and linked to servos. Tubing has been sanded where it needs to be CA'd in to prevent over-flexing.
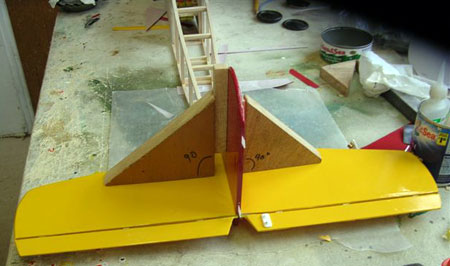
Out of order, but triangles at exactly 90 degrees of angle made of hardwood and with thick flat stock CA'd to them will assure that the vertical stabilizer is at exactly 90 degrees perpendicular to the horizontal stabilizer. The assembly is glued in with epoxy. Epoxy, by the way, can be easily removed using a heat gun. When the stuff bubbles, the parts release. Reversed the process, you better be quick...it sets up fast. Of course, you can always use more epoxy...
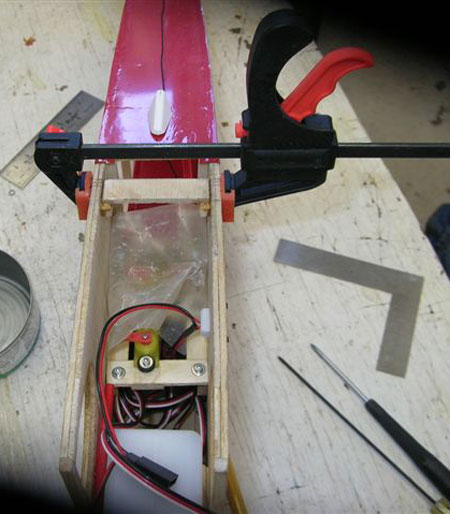
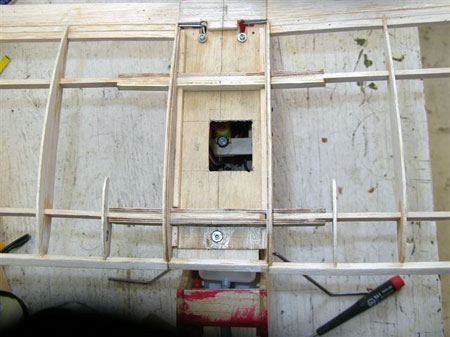
Due to the narrowness (1 7/8 inches) of the fuselage, the rudder servo and elevator servo had to be put in "back to back". The rudder servo is on the left and the elevator on the right. The tubing ran very well and after testing, only needed to be glued and braced near the servos (small squares of balsa) and glue where it exited the fuselage without any brace.
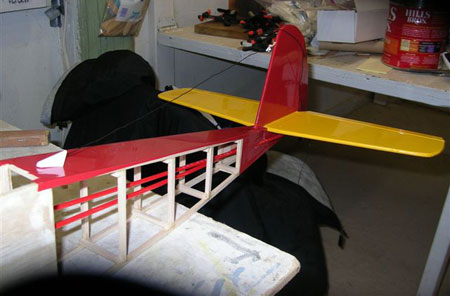
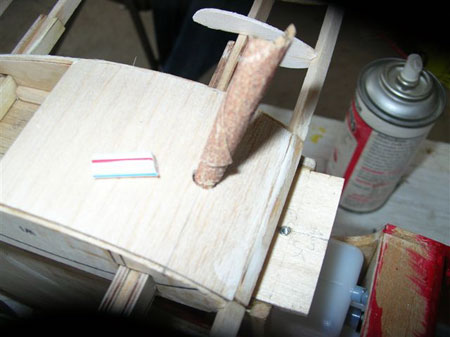
The antenna has been run. A small T-pin and some CA to hold it into the vertical stabilizer has a rubber band looped over it for a shock absorber. The fairing and hook are commonly found in hobby shops.
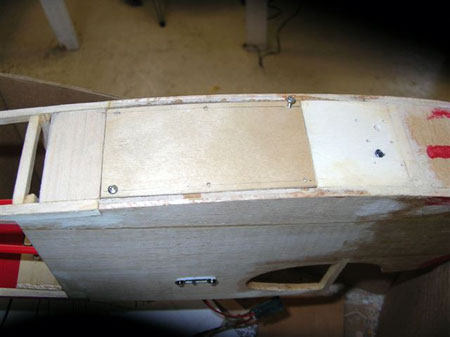
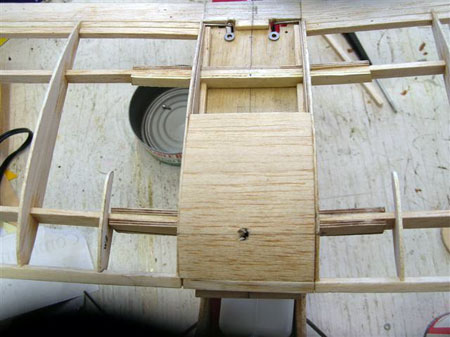
An access hatch is laid out and being drilled behind the landing gear mount for easier extraction of the battery. 1/8 X 1/4 spruce has been located inside and CA'd in place. The birch ply covering is 1/32 inch and held down with #2 phillips button-head screws from Great Planes.
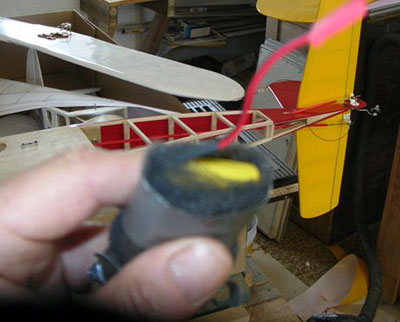
The battery is wrapped in air-conditioner filter (cheap, available, and works well) and duct taped. What would we do without duct tape?
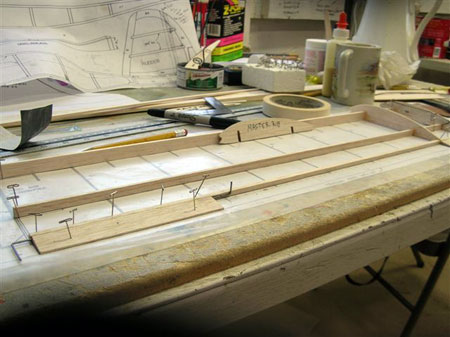
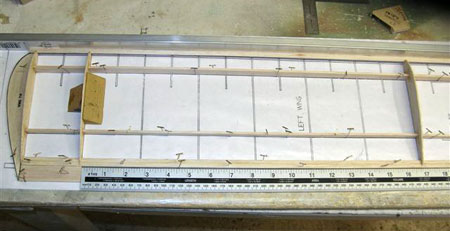
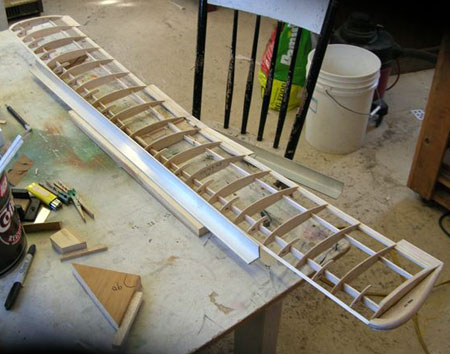
3/16" manufactured trailing edge is cut to size and laid in with a steel rule to keep things nice and straight, then pinned in place. A gap is left for the aileron which will be made from the same stock.
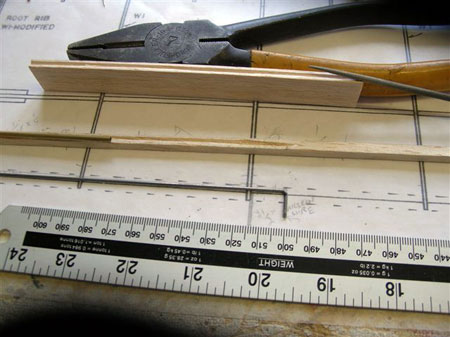
A piece of the 3/16 square stock is cut to run the length of the trailing edge laid out on the plans and will take the aileron strip hinges to be CA'd in. The wing root trailing edge and the corresponding marked part of the 3/16 square stock are first grooved with a Carl Goldberg centering tool and then routed out with a piece of brass tube or wire and a round needle file finishes the job up smooth. The aileron operating wire is bent to the redrawn plan shapes and cut. Then I duplicate it and put it in a large coffee can "holding bin" along with any other duplicated wing parts. Large coffee cans are handy for that. I hate losing parts I duplicated.
The routed trailing edge has been laid back in and the 3/16 stock glued in with the aileron wire inside. The 3/16 inch thickness would not allow for any tubing for a wire guide! The wire was then pre-greased with Vaseline. The 3/16 stock was CA'd in place on the top side after careful checking to make sure everything was aligned perfectly and pinned in place. The CA won't stick to the Vaseline, so the wire is "trapped" inside the two wooden pieces. It works like a champ! When finished building the wing I'll remove it,turn it over, and the aileron root and 3/16 stock will be CA'd on the other side The wing tips have been cut and matched and one glued in with the wing spars. On this type of wing, the leading edge has to be glued in last. Note the "Master Rib". This is for duplication purposes and will be used LAST. If you don't copy from a "master" each time, the size of duplicates constantly grows. You can use the "master" to check that the next pieces you make are indeed exact duplicates.
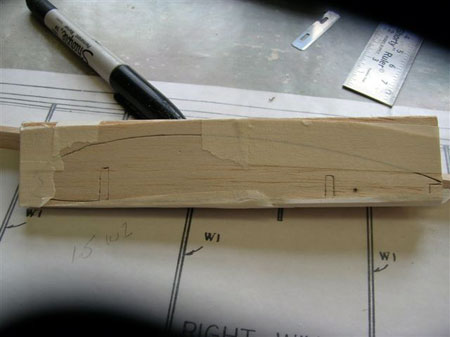
In building the wing, I decided to go with a flat surface or "asymmetrical" wing for performance. Therefore, The wing ribs had to be cut "flat" underneath. And, if you gotta do that...along with some other modifications for the trailing AND the leading edge.......shucks...make a "Master" and start cutting.
The first piece here is drawn from the "master rib" but there are 7 other pieces of sheet behind it, the whole taped in place with masking tape. You can see your lines through the tape! The tape holds everything in place as you cut out the 7 pieces on the scroll saw, or band saw if you have one. Retape when you finish the first cut lengthwise to continue holding everything true. Then repeat the process using a belt sander or sand by hand. Mass production!
Invest in a long piece of aluminum angle. It comes in so handy for truing things up...like leading edges that are elevated where the steel rule won't reach. When everything is lined up, hit the pieces with CA. A master root rib has been cut out at left, but will not be inserted until the center section is built and everything checked for trueness, including the dihedral.
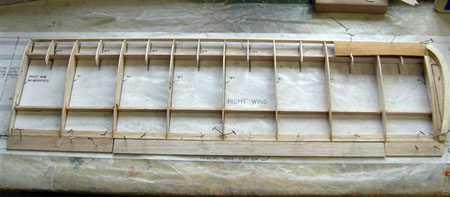
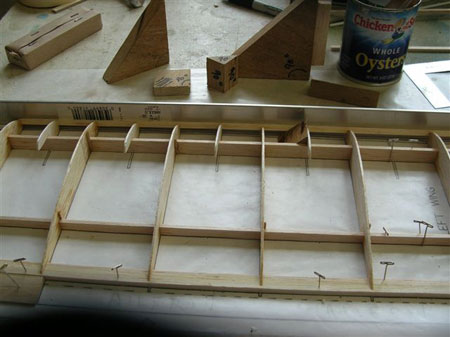
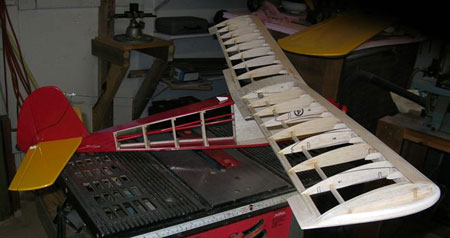
A view of the right wing. The aileron is placed in position but not glued. The wing tip has been built up to receive Ultracote covering, and a strip of 3/16 soft balsa shaped and glued to the rib next to the wingtip, likewise to help in the covering process. Note the 1/32 stock pinned in place to check the fit. The leading edge top and bottom will be covered with 1/32 back to the first spar to add strength by forming a D shape. The trailing edge has a 3/8 inch wide 3/16 strip to reinforce it. The plans call for 3/16, but that's for free flight. 3/16 would not be enough for the greater stress of radio control.
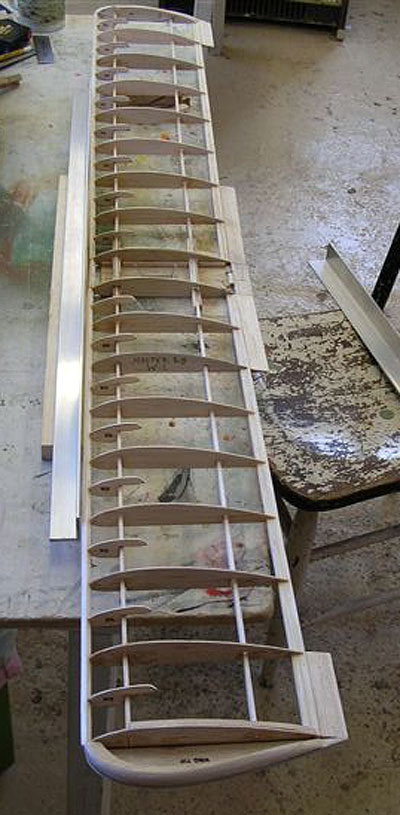
The left wing construction has begun. The leading edge stock is NOT glued in yet. The aluminum angle assures the wing leading edge will be true. The steel rule likewise assures the trueness of the trailing edge. The rib near the wing has just been glued in and is braced by two homemade 90 degree angles of hardwood.
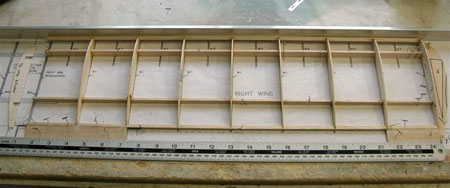
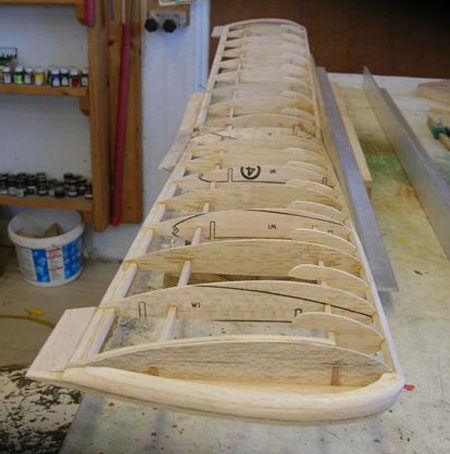
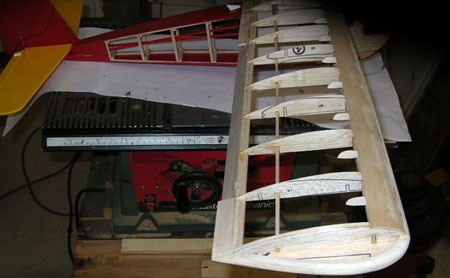
The left wing is framed up and all the ribs are in. The ribs should be put in FIRST and made true with the aluminum angle and shop rule. The false ribs or riblets if you barbecue, can then be made and "fine tuned" by sanding. Doing it this way produces a true wing. Notice all the homemade 90 degree hardwood angles. Homemade jigs are well worth the time. Including very small ones as you see next to the false rib or riblet being inserted. It was made especially to get between the leading edge and the main spar.
Three views of how to check the trueness of a wing BEFORE YOU GLUE. Use aluminum angle. And if your angle is not tall enough...go buy taller angle...or block up what you have with nice, true lumber. Alignment is so much easier with a nice, straight line. I could only wish I had longer angle for this wing so it stretched beyond the wingtip. But, if the separate pieces are trued, the shortness of the angle or ruler is overcome by previous work.
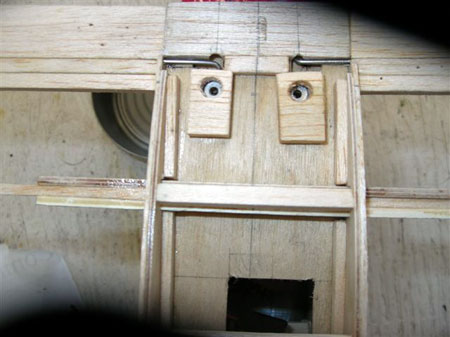
The wing will be held to the fuselage using 2-56 bolts. Two in the back and one in the front. The back is shown here, glued in with epoxy and clamped with cheap Chinese-made clamps...and they come in very handy for modeling. Epoxy is neat stuff not only for the strength of the bond, but because if I've miscalculated, a heat gun is going to loosen the epoxy right up and I get to "rethink my position" and reglue without difficulty.
Great Plains 2-56 socket heat bolts are fitted to blind nuts CA'd in under the 3/16 ply in the cabin. I will then CA the washers to the plywood inside the wing and "box in" the washers and bolt holes with balsa.
After cutting out and trying the 1/16 sheet balsa covering, I marked it for drilling an access hole to insert and remove the socket head bolt.
A spiral-wrapped sheet of medium grade sandpaper makes a fine reamer. The plastic soda straw next to it will be inserted and lined up over the washer. That way you don't lose the bolt and it is self-aligning to a certain degree.
Two pieces of balsa have been drilled to the size of the washer. One is CA'd in place. The other is being sanded to fit. When covered with the rest of the 1/16 sheet covering, the should give access to the 2-56 bolts and prevent losing them inside the wing center structure.
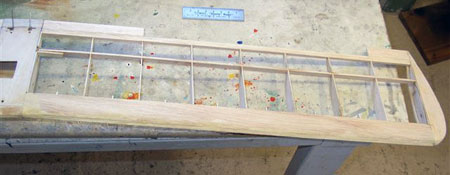
Right wing underside has 1/32" sheet balsa installed. Left wing underside is ready, and the balsa has been measured and cut ready to try the fit.
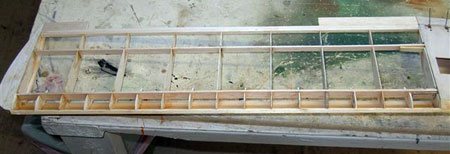
Two photos at different angles showing wing leading edge covered in a "D" shape with 1/32" balsa sheet back to the main spar for more strength required flying radio control.
I found that the mounting bolts I installed interfered with the operation of the ailerons, so I made a change in the mounting bolt system, moving it farther back on the trailing edge. It is noted below in 001 and should be substituted for the photos and text where I explain first installing them, and the image and text for 001 below should be substituted.
After centering the leading edge of the wing and installing the front 2-56 socket head bolt and blind nut, the trailing edge is taped in place and the distance from a specific point on the trailing edge to a specific point on the wing is measured and adjusted for BOTH right and left sides of the wing until the distance is exactly equal. I used the tip of the balsa trailing edge of the horizontal stabilizer where the elevator is joined and the inside corner of the wingtip's trailing edge. This is where exact duplication pays off. When the distances were equal, the exact center of fuselage and wing were marked. The wing was taped with masking tape and first hole drilled, the blind nut installed, then the second hole drilled and blind nut installed. I installed a 1/16 strip of plywood over the cabin trailing edge to reinforce for the mounting bolts.
Hinge locations on both ailerons have been marked and slots cut. The aileron wire rods from the servos have been located, marked and drilled. The wafers have been inserted and the ailerons test-fitted but NOT CA'd YET. The wing and ailerons must be covered first.

continued on page 4
page 1
page 2